
")
There are few things more nightmarish than accidentally deleting the files that you’re working on. Be it photos, videos, or work documents, losing data is more common than you’d expect. The good news? In many cases, you can still salvage those files with the right approach and tools.
This guide handles the specifics of how to recover deleted files on Windows and Mac — listen up, because it provides step-by-step instructions and an overview of some of the latest tools, including Disk Drill for Mac. We’ll also look at some free recovery options and more advanced options that involve your Mac Terminal or the built-in backups.
How to Recover Deleted Files in Windows
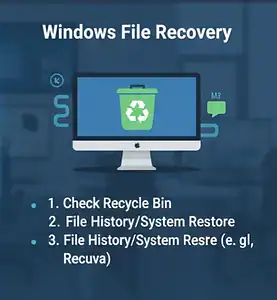
Check the Recycle Bin
The Recycle Bin is an obvious place to look for files that have just been deleted.
Here are the steps to recover files from the Recycle Bin:
-
Open the Recycle Bin from your Desktop or Start menu.
-
Search for your deleted file.
-
Right-click on the file and select Restore.
-
Or drag and drop it into a folder of your choosing.
FYI: Turn on delete confirmation so it doesn’t happen in the future. Right-click the Recycle Bin, select Properties, and check “Display delete confirmation dialog.”
Restore from File History Backup
If you’re using Windows 8.1, 10, or 11, File History can be useful. It backs up the versions of files to external storage or network drives.
How to recover using File History:
-
Look for Restore your files with File History under the Start menu.
-
Look through versions of the missing file.
-
Click on Restore to put it back in its original place.
For fixing other Windows-related issues, such as Windows Update Error 0x80070643, check our full guide.
Use Windows File Recovery Tool
For files that are no longer in the Recycle Bin, the Windows File Recovery app may be of assistance. This command-line utility can rescue deleted files from SSDs, HDDs, and USB drives.
-
Normal mode: Ideal for files you deleted recently.
-
Thorough mode: Searches more deeply for older or overwritten files.
How to Recover Deleted Files on Mac
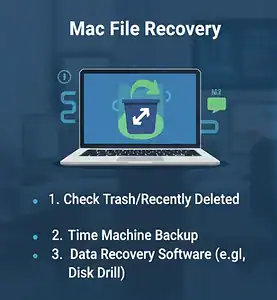
Check the Trash
Just like Windows, deleted files on a Mac go straight to the Trash.
How to recover files from Trash:
-
Open the Trash from the Dock.
-
Right-click the file and choose Put Back.
-
Or drag it to another folder.
Restore with Time Machine Backup
Time Machine is a built-in backup feature in macOS. If you set it up before the files are deleted, recovery is fast.
To recover using Time Machine:
-
Plug in your Time Machine backup drive.
-
Access Time Machine from Spotlight or System Preferences.
-
Return to the folder that contained the deleted file.
-
Choose the file and hit Restore.
If you’re new to macOS, you may also want to read our guide on how to copy and paste on Mac.
Use Disk Drill for Mac (Best Recovery Solution in 2025)
If the file isn’t in Trash and you don’t have a backup, you need Mac file recovery software. One of the most well-known is Disk Drill Mac, or Disk Drill for macOS.
Disk Drill offers:
-
Restore deleted files permanently from Mac.
-
Supports SSDs, HDDs, USB drives, and memory cards.
-
Easy interface suitable for beginners.
-
Free version for limited recovery.
Recovery steps with Disk Drill:
-
Go to the Disk Drill for Mac download page and click the Add to cart button.
-
Open the app and pick the drive where the files were deleted.
-
Click Search for lost data.
-
Preview recoverable files.
-
Select the desired files, then click Recover to save them in a secure location.
Common keywords include phrases like “disk drill data recovery,“ “disk-drill,“ “drill disk,” and “disk drill OS X” — all referring to this one powerful app.
Recover Permanently Deleted Files on Mac Using Terminal
For advanced users, here’s how you can use Mac’s Terminal.
Steps (for experienced users):
-
Open Terminal located in Applications > Utilities.
-
Type:
This shows recently deleted files.
-
Move the file back with:
Note: This only works if the file is still located in the hidden Trash folder and has not yet been overwritten.
Premium and Free Mac Data Recovery Software Choices
In addition to Disk Drill, you have free data recovery options for your Mac drive:
-
PhotoRec (open-source, many file types).
-
TestDisk (great for partition recovery).
-
Lazesoft Mac Data Recovery (user-friendly).
They can also assist in recovering lost files, enabling you to return files to your Mac without further complications.
For more ways to optimize your device, see our best Mac maintenance tips for beginners.
Professional Tips on Preventing Data Loss in the Future

-
Use Time Machine or File History to turn on automatic backups.
-
Sync files in real-time with cloud services such as Google Drive, Dropbox, or iCloud.
-
Save your backups on external SSDs or HDDs.
-
Think twice before emptying the Trash or Recycle Bin.
FAQs About Recovering Deleted Files on Windows and Mac
How do I recover a file I accidentally deleted on a Mac?
Can you restore permanently deleted files on a Mac?
Is it possible to retrieve deleted files from a Mac without Time Machine?
Can I recover the deleted files on Mac for free?
What is the best software to recover deleted files on a Mac?
Final Thoughts
If you’re asking yourself how to recover permanently deleted files from Mac or Windows, there are numerous methods at your disposal. Begin with the Trash or Recycle Bin, and then backups.
Failing that, you can use a heavy-duty piece of recovery software like Disk Drill Mac to bring back files after even permanent deletion.
So whether you need information on how to recover deleted files on a Mac for free, how to use Mac Terminal, or where to search for Mac file recovery software free options, they’re all now available when you want them.
Start using backups to protect yourself. That way, the next time you unintentionally delete something, retrieving it won’t require a panic attack.