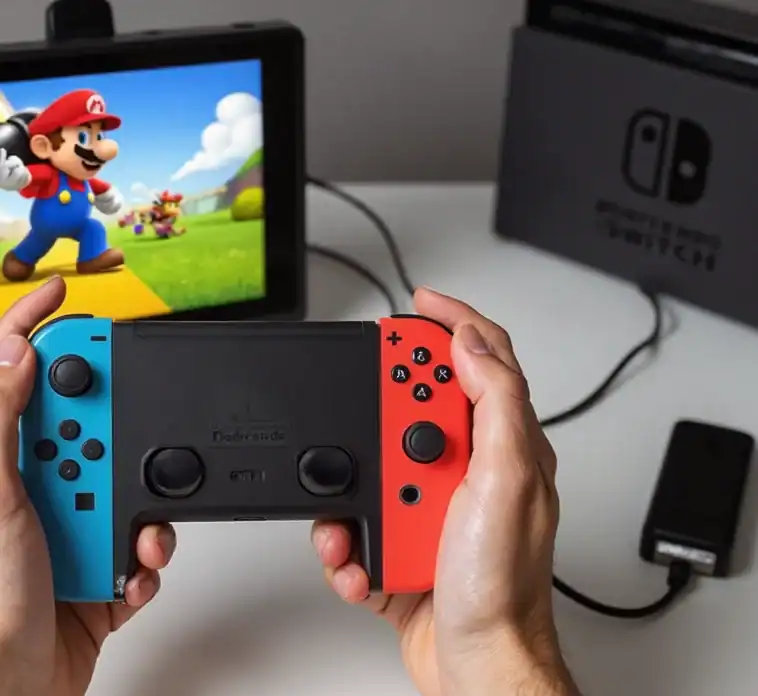
If you are one of those who have thought about connecting a ‘Nintendo Switch’ to a laptop or PC, then you have quite a few options. The question can be for several reasons; among these, the more significant reasons are the desire to play computer games, watch content streamed from the laptop/PC, and transfer files between the two devices.
After reading this guide, you will be aware of the various methods that can be used to achieve the mentioned goals, the different connection methods, and the real uses of having the Switch and the PC connected.
Is it possible to connect a laptop to a Nintendo Switch?
Indeed, it is possible to link your Nintendo Switch to a ‘laptop or PC’. Nonetheless, the approach will vary according to the particular objective that you want to accomplish. For example, you may want to play games, record gameplay, or transfer files.
Next are three primary methods for setting up a connection:
-
The capture card
-
Via an HDMI input (if there is any)
-
Through a Nintendo Switch emulator
Let’s examine each method in detail.
Method 1: Connect Nintendo Switch to Laptop Using a Capture Card
The capture card is the most trusted and frequently selected option when one wants to enjoy Nintendo Switch games on the laptop screen. It enables streaming or recording.
What You Need:
-
A video capture card ‘(e.g., Elgato HD60 S)’
-
HDMI cable
-
A Nintendo Switch Dock
-
‘USB cable’ (for connecting the capture card to your laptop)
-
‘Streaming software’ (e.g., OBS Studio)
Step-by-Step Guide:
-
Place your Nintendo Switch in its dock and power it on.
-
Attach one end of the ‘HDMI cable’ to the HDMI OUT port on the dock.
-
Insert the HDMI cable’s other end into the HDMI IN port on the capture card.
-
Attach the ‘capture card’ to your laptop using the USB cable.
-
Open OBS Studio (or the capture card’s proprietary software) on your laptop.
-
Create a new video source and select the capture card as the input source.
-
The Switch display will appear on your laptop screen. You can now play in real-time or begin recording/streaming.
Pros:
-
‘High-resolution video and audio’ (up to 1080p or 4K)
-
Great for ‘real-time’ gaming and streaming
-
Minimal input lag
Cons:
-
Requires purchasing additional hardware
-
Needs a capable PC and cooling for optimal performance
Method 2: Connect Nintendo Switch to Laptop with HDMI Input (If Available)
Some rare laptops come with ‘HDMI input’ functionality, which allows direct video input from devices like the Nintendo Switch.
What You Need:
-
HDMI cable
-
A laptop with an HDMI input port
-
A Nintendo Switch Dock
How to Connect:
-
First, dock your Nintendo Switch and turn it on.
-
Take an HDMI cable and connect it from the dock’s HDMI OUT to the laptop’s HDMI IN.
-
If your laptop manufacturer provides display software, install it.
-
Your laptop screen should now act as the Switch screen.
Pros:
-
No capture cards or extra software required
-
Easy and quick setup
Cons:
-
Laptops are mainly designed for HDMI output only
-
Only compatible with some models and are not the best for gaming
Method 3: Use an Emulator to Play Switch Games on a PC
Also, if you are not interested in connecting your Switch physically, but you want to play its games, then you can use an emulator. However, please keep in mind that you have to be the legal owner of the games and system firmware.
What You Need:
-
‘Nintendo Switch Emulator’ (e.g., Yuzu, Ryujinx)
-
Game ROMs (legal backups only)
-
A high-spec PC (for smooth performance)
Pros:
-
No need to make a physical connection
-
The possibility of graphics enhancement that surpasses native resolution
Cons:
-
Tested games may not work properly
-
The process of setting it up is complicated and needs some technical knowledge
-
The legality and morality of the issue are still debated
What Can You Do With a Connected Switch to PC?
Nintendo Switch owners are not only confined to the Switch when it comes to gaming. It is very convenient to play Switch games on a PC, and it gives you a lot of functionalities that were not previously possible.
The following are the specific uses:
1. Play on a Big Screen
PC monitors generally have a bigger screen. As a result, it becomes a lot easier to play a game with improved visuals on the computer.
2. Recording and Streaming
In addition, you have the option of recording or streaming Nintendo Switch game videos over Twitch or YouTube. This is perfect for people who create content and want to have the possibility of recording and uploading their gameplay videos or editing and uploading them on the internet.
3. Capture and Share Game Footage
Game clips or screenshots can be done on the PC and shared there directly, thus no need for any other video editing interface.
4. Play with Different Controllers
There is no need for you to be with a specific controller only because some systems allow you to switch to various controllers or even the keyboard.
5. Switch Between Different Services While Playing
When the Switch is connected to the PC, you can move back and forth between the game and other sites, such as chat windows, alerts, etc., much more easily.
6. Backup and Restore Nintendo Switch Game Saves
The possibility of backing up or saving the data of your games on the computer is also there. Thus, this way allows not only the smooth and space-saving management of game data but also allows the user to back up their game progression if necessary.
How to Transfer Files from Nintendo Switch to a PC or Laptop
Direct file transfer is not supported on Nintendo Switch to PC for game files, but through three different methods, there is a possibility of transferring media and game data.
Method 1: Transfer Files Using a micro SD Card
-
Put a microSD card in your Nintendo Switch.
-
Go to Home > Album > Manage Screenshots and Videos > Copy to microSD Card.
-
Turn off your Switch and take the card out.
-
Insert the card into the reader on your laptop.
-
Open the “Nintendo” folder to find the files and transfer them.
Method 2: Transfer Files Using a USB Cable
-
Use a USB-C cable to connect your switch to your PC.
-
On the Switch: System Settings > Data Management > Manage Screenshots and Videos > Copy to PC via ‘USB Connection’
-
On your computer, open the new drive’s folder.
-
Find the folder named Nintendo and move the desired files there.
Method 3: Wireless Transfer via QR Code
-
On your Switch, select Album and then tap on the image or video.
-
Pick Sharing and Editing > Send to ‘Smartphone’ or PC.
-
Use a QR scanner on your laptop or phone to scan the shown ‘QR code’.
-
Open the URL that appeared and save the files.
Compatible Devices:
-
Android and iOS smartphones
-
Windows or ‘macOS laptops’ and desktops
Key Features:
-
Screen mirroring
-
Cross-platform compatibility
-
Controller support for mobile games
-
Remote access
FAQs
Can I connect my Switch to a laptop with just an HDMI cable?
Is there a way to connect without a capture card?
Can I use a 'MacBook' instead of a Windows laptop?
Can I record or stream gameplay this way?
Does this method work with the Switch Lite?
Is OBS free to use?
Conclusion
A Nintendo Switch linked to a PC or ‘laptop’ can greatly extend its usage, offering a multitude of options. Use any method that suits ‘your needs’ if you want to play on a bigger screen, stream your gameplay, or just transfer media files. The capture card method is the most reliable and flexible, but other options, such as emulators or ‘HDMI input’ (if you have it), allow you to be more flexible.
Today, select the method that best suits your setup and enjoy a better gaming experience.
- Read More: Nintendo Black Friday 2024 Deals: Top Discounts on Games
- Read More: Loop Switch 2 Review: Easily Adjustable Earplugs for Music Lovers
- Read More: Tech Gifts Under $100 from Apple, Samsung & More
- Read More: USB-A vs. USB-C: The Ultimate Guide to Speeds, Power & Connectors
- Read More: Top Retro Handheld Gaming Consoles of 2024: A Comprehensive Guide


